
Are unsightly holes in your drywall driving you up the wall? Don’t despair! In this comprehensive guide, we will unveil expert tips and tricks to help you master the art of patching holes. Whether it’s a small nail hole or a gaping crater, our step-by-step instructions will have your walls looking flawless in no time. By implementing expert advice on home drywall and painting, you can achieve seamless results that rival those of a professional contractor. Say goodbye to expensive repairs and hello to DIY mastery as we reveal the secrets of professional drywall repair techniques. Get ready to transform your home with ease and confidence!
Table of Contents
Types Of Holes And Their Causes
In the world of drywall disasters, holes are often the main culprits. But not all holes are created equal, and it’s important to understand their types and underlying causes in order to effectively patch them.
- First off, there are the infamous nail holes. These tiny punctures may seem harmless at first glance, but they can become quite noticeable if left unaddressed. Nail holes commonly occur when hanging artwork or shelves on the wall, but can also be caused by accidents during furniture assembly or removal. It’s essential to use the right size of nails or screws for each task and properly fill these little gaps to maintain a flawless appearance.
- Next up, we have impact holes. Whether from an overzealous swing of a door handle or an unintentional collision with furniture during a rearranging frenzy, impact holes can quickly turn a pristine wall into an eyesore. Depending on their size and severity, these types of holes may require more than just patching – sometimes replacing damaged sections of drywall is necessary for a seamless repair job.
- Lastly, we come to plumbing-related holes. Burst pipes or leaky faucets can wreak havoc on your walls and create large openings that simply cannot be ignored. These types of holes need prompt attention as they can cause further damage if not addressed quickly. Proper waterproofing techniques should always be employed when patching plumbing-related holes to prevent future issues.
Step-By-Step Guide To Patching Small Holes
- Once you notice a small hole in your drywall, don’t panic—it’s a common issue that can easily be fixed. To patch up these small holes, start by cleaning the area around it with a damp cloth to remove any dust or debris.
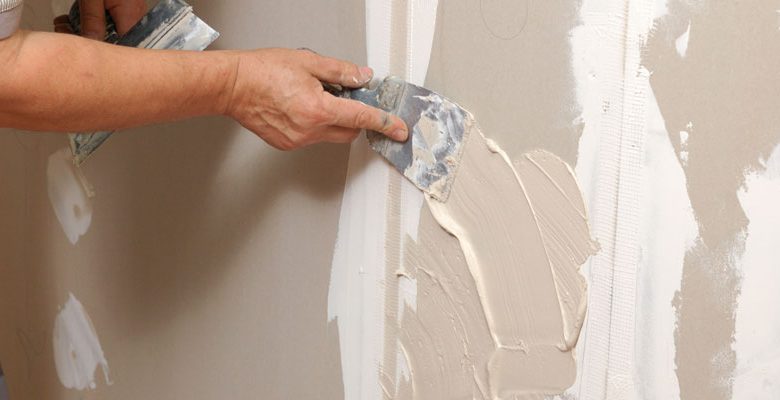
- Next, apply a layer of spackling compound using a putty knife and smooth it out evenly over the hole. Make sure to feather out the edges for a seamless finish.
- After allowing the compound to dry completely, sand down any rough spots until the surface is smooth. This will ensure that you won’t see any imperfections once you paint over it.
- Finally, apply a primer or sealer before painting to ensure that your patched-up hole blends seamlessly with the rest of your wall.
Remember, small holes are quick fixes that can easily be dealt with at home without professional help. With just some basic tools and materials readily available at most hardware stores, you can save time and money by patching up those unsightly holes in no time.
Step-By-Step Guide To Patching Large Holes
Patching large holes in drywall can be a daunting task, but with the right knowledge and technique, it doesn’t have to be. Here is a step-by-step guide to help you tackle those annoying wall craters like a pro.
- First, assess the size of the hole. If it’s larger than six inches in diameter, you’ll need to use a different approach than for smaller holes. Start by cutting out any loose or damaged pieces of drywall around the hole. This will create a clean and even surface for patching.
- Next, measure and cut a piece of drywall that will fit snugly into the hole. Apply joint compound around the edges of the hole and press the piece firmly into place. Use joint tape over any seams or gaps, and apply another layer of joint compound over it. Smooth out any excess compound using a trowel or putty knife.
- Finally, once the patch is dry, sand it down until smooth and level with the rest of your wall. You can then paint over it to match your existing wall color.
Remember that patience and precision are key when patching large holes in drywall. By following this step-by-step guide, you’ll be able to seamlessly repair even the most unsightly gashes on your walls and restore them back to their former glory
Conclusion:
In conclusion, achieving seamless and professional-looking results when patching drywall holes requires attention to detail and the right techniques. One tip to remember is to use a setting-type joint compound, as it dries harder and sets faster than a regular compound. This will help create a smooth and sturdy finish. Additionally, sanding is crucial in achieving a flawless result. Start with coarse-grit sandpaper to remove any excess compound, then progressively move to finer grits for a smoother finish. With a focus on precision and attention to detail, drywall repair in St. Paul can be achieved with professional results. Whether it’s a small nail hole or a larger damaged area, the key is to take the time to properly execute the repair process.
Another important factor in achieving professional results is ensuring proper paint application. Before painting, make sure the patch is clean and free of dust or debris. Using a high-quality primer will help the paint adhere better and provide an even color coverage. When applying paint, use smooth strokes and take your time to avoid streaks or uneven patches.
Remember that practice makes perfect when it comes to patching drywall holes. Don’t be discouraged if your first attempts don’t turn out exactly as desired – keep refining your technique and following expert tips until you achieve those seamless results you’re aiming for!